Showing posts with label Daring Bakers. Show all posts

Saturday, May 9, 2009

It's almost time for another wonderful book


So you're all wondering, "How the hell am I suppose to feed a vegan if you keep disappearing?" All I can say is, sorry about that. I'm working on a big project at the moment (nothing crazy exciting for anyone but myself I'm afraid) that is keeping me more then busy. I'm a bit overwhelmed really but I'm just going to keep chipping away.

Aaannnyyway . . . I thought I should probably post something for the April Daring Bakers Challenge. I did it, I just have the worst time sitting down to post about it. Well, I kinda did it.

The April 2009 challenge is hosted by Jenny from Jenny Bakes. She has chosen Abbey's Infamous Cheesecake as the challenge.


So this challenge allowed for some creativity. I took that permission and stretched it to a tester recipe for Isa Moskowitz and Terry Romero's new cookie book. So I would like to reveal one delicious brownie.
Chocolate Chip Cheesecake Brownie

It's in the spirit of cheesecake at least. I just couldn't bring myself to buy 3 tubs of vegan cream cheese for a whole cake. That's not something I need lying around. Now I realize that this isn't the best picture of this delectable treat so I would also like to direct you to the flickr pool for more photos from this highly anticipated book that looks like it will be a companion to Vegan Cupcakes Take Over the World, to be entitled Vegan Cookies Take Over Your Cookie Jar. This takes care of the ever present chocolate craving as well as the cheesecake need we sometimes experience. For chocolate chips I used Lindt 70% thins all crumbled up. That was the ticket let me tell you.

So I ask that you please stick with me here. I have some tasty treats waiting in the wings and I will try to set aside time to complete the posts for them.

Saturday, March 28, 2009

All about the bechamel

This month's challenge was a familiar favorite but still had it's challenge. First I want to have a little rave about the Daring Baker's new look. They have the new site up and running so check out The Daring Kitchen! And how awesome are the new logos?! Here is the whole new crew of Daring Kitchen mascots. I can't decide who to use.
Anyway, back to the challenge. The March 2009 challenge is hosted by Mary of Beans and Caviar, Melinda of Melbourne Larder and Enza of Io Da Grande. They have chosen Lasagne of Emilia-Romagna from The Splendid Table by Lynne Rossetto Kasper as the challenge. I am a Splendid Table listener. I used to try and catch The Splendid Table at it's scheduled time on NPR but I am usually working so it was a fairly rare occation. Then I discovered podcasts and haven't looked back since. Of course now I'm addicted to podcasts but there are worse things to become addicted to (isn't it funny we use this line everytime we find ourselves spending too much time with something, "There are worse things to be addicted to.")

Moving right along. The first thing you need for a good lasagne is the noodles. This brings us to the part of this challenge that was the challenge. I have never made pasta from scratch before and the Lynne's recipe calls for eggs so taking the suggestion of other alternative Daring Bakers I tried out Bryanna Clark Grogan's recipe. This was a good move. Pasta came out fantabulous and I highly recommend it for any of your pasta needs. Even me, who usually screws up these things on the first try, got it to turn out well easily the first time.

After the pasta I just needed to decide on sauce and cheeziness. I kept it simple. I find the simplier the better for the taste and for my time management. I wanted to stay within the components of the original recipe which included something I have never used in a lasagne before, Bechamel Sauce. I've never heard of this. Has anyone else? Is this a wonderful secret that has been kept from me all these years? It's pure genious! So smooth and creamy. I happened to have Veganrella in my fridge from a friend but in the future I don't think I'll be using any cheese sub at all. The bechamel is perfect for that creamy factor.

Bechamel Sauce

4 tablespoons Earth Balance vegan margarine
4 tablespoons all purpose unbleached (plain) flour, organic stone ground preferred
2&2/3 cups nondairy milk of choice (I used almond)
Salt and freshly ground pepper to taste
Freshly grated nutmeg to taste

Using a medium-sized saucepan, melt the margarine over low to medium heat. Sift over the flour, whisk until smooth, and then stir (without stopping) for about 3 minutes. Whisk in the milk a little at a time and keep the mixture smooth. Bring to a slow simmer, and stir 3 to 4 minutes, or until the sauce thickens. Cook, stirring, for about 5 minutes, until the sauce thickens. Season with salt, pepper, and a hint of nutmeg.

I kept the marinara sauce simple. I'm not even sure you'd call this a recipe. Just heat a medium saucepan over medium heat. Add a little oil or water just to prevent sticking. Add a chopped onion and 4 minced cloves of garlic. Cook 5ish minutes. Add a large can of diced tomatoes. Add some oregano, basil, a little salt if you like. That's pretty much it. To add some extra protein to the mix I rehydrated some soy/tvp chunks I happened to have around but you could use cooked lentils, tvp mince, veggie crumbles, crumbled tempeh, whatevs.
To assemble this beautiful masterpiece (ok it doesn't look that beautiful but I never claimed to be a photographer). I boiled a layer of pasta at a time and applied the fillings as the next layer was cooking. So first add a little bechamel sauce to the bottom of your pan (I used a 9x13"), then noodles, then a little more bechamel, then tomato sauce, grate vegan cheeze if using, fleck a bit more bechamel on there, another layer of noodles, bechamel, tomato sauce, cheeze & bechamel. Continue this wonderful cycle as long as you can finishing with cheese and bechamel on top. Bake about 30 mins covered with foil and uncover and bake a bit more to brown up the top a bit.

I'm pretty damn excited to have successfully made my own vegan noodles and I will definitely be doing this again because it was so easy and it feels great to have a much better understanding of what exactly is going into your food.

Wednesday, March 4, 2009

It's about time for another ice cream


No, it's no longer February but I needed to get this challenge behind me and look to the new challenge this month. For February the word came come down from our hosts:

The February 2009 challenge is hosted by Wendy of WMPE's blog and Dharm of Dad ~ Baker & Chef.
We have chosen a Chocolate Valentino cake by Chef Wan; a Vanilla Ice Cream recipe from Dharm and a Vanilla Ice Cream recipe from Wendy as the challenge.


I decided to go raw for this challenge. Well mostly raw. These recipes aren't vegan to start with so modifications would have been necessary anyway. Is this raw version just like the original? No. Maybe I could, with lots of work and the Vitamix I might work out the right consistency. Maybe in a couple months time when I might possibly find myself with free time on my hands this is something I might work on . . . . who knows what the (my) future holds.

I apologize for the slightly blurry picture. My dessert pictures always seem to come out this way. I just can't hold still. I get too excited!


Raw Flourless Chocolate Cake (take 1)

1/4 c raw cocoa nibs
1/4 c cashews

1/2 c walnuts

5 pitted dates

1 vanilla beans or 1/2 tsp vanilla extract

Add cocoa nibs to food processor and process until well broken up. Add nuts (you can replace these with any nuts you prefer really, they all go well with chocolate) and process again until nuts are finely ground. Add dates and vanilla. Process this until mixture comes together in a pasty dough. Press this mixture into a small tart pan or shape with your hands however you'd like. Enjoy!

I decided to pair this with an ice cream that I've been meaning to make for a while. A simple creation to carry over the cocoa nib deliciousness. I would like to try some raw ice creams at some point. When young coconuts aren't ridiculously expensive maybe.

Stracciatella Coconut Ice Cream

1 can coconut milk
2-4 Tb agave nectar

1 tsp vanilla extract

1/4 c raw cocoa nibs

Stir together coconut milk, agave to taste and vanilla. Place in ice cream maker and follow manufacturers instructions to freeze ice cream. 5 mins before freezing cycle is complete add cocoa nibs. Place completed ice cream in freezer to firm up more until ready to serve. You may need to set out homemade ice cream a little ahead of when you need it as it tends to harden more then comercially made ice creams.


Friday, January 30, 2009

try try again


This month's challenge is brought to us by Karen of Bake My Day and Zorra of 1x umruehren bitte aka Kochtopf. They have chosen Tuiles from The Chocolate Book by Angélique Schmeink and Nougatine and Chocolate Tuiles from Michel Roux.

Attempt one was a spectacular failure. I have no pictures. Well I could go photograph the bin if you want but y'all should just take my word for it. Complete crap. That, however, is to be expected. My first attempt for all these Daring Bakers Challenges are failures of varying degrees. Sometimes salvageable, sometimes better forgotten. It's all the more frustrating when you use a recipe that has worked for people and it doesn't work for you. You start wondering what the heck is wrong with you that you couldn't follow simple directions. In the end this doesn't necessarily accomplish anything and it's just not that easy. Simple directions can still produce something fairly complex or delicate. In this case a very delicate balance in the batter, in the oven temperature, in the timing and then in the final cookie.

I feel a bit silly about it all now. My second attempt was in another direction. Chocolate. Silly because I work in chocolate. There is always chocolate around my house, around my work. I talk chocolate every day. Why then did I not just go with the chocolate route to begin with? Because I thought I'd be clever and make it a challenge for myself. That'll learn me.

Anyway on with the successful part of the challenge.
Chocolate Tuiles
3.5 oz (100g) dark chocolate (I used Lindt 75% Ecuador)

Temper the chocolate. Spread into desired shapes on a sturdy piece of plastic (or silpat could work). Once set enough to move, shape them as desired (over a glass, rolling pin, whatevs). Remove them from mold right before serving to preserve shape and sheen.
If you are not into tempering you could add a little (1 tsp or less) of vegetable shortening. This should keep the chocolate from blooming. This may also keep the chocolate from completely setting at room temp so you may need to keep it chilled to hold it's shape.

Strawberry Banana Sorbet
1 yellow ripe banana
1 bag frozen straberries (thawed)*
1 tsp-1 Tb lime juice

Toss strawberries, banana and lime juice in the blender of food processor and blend until smooth (or as smooth as you'd like. I went for no chunks). Pour into your ice cream maker and freeze according to manufacturers directions.
You could also use frozen fruit and process this into something of a sorbet in your blender or food processor but unless you have a Vitamix it might be a challenge to get a good consistancy.
*bag can be of any size really depending on how much you want.

This is the taste of summer. Strawberries get me every time.

Saturday, January 3, 2009

Yule Love It


A little late but done none the less here it is.

And the Challenge this month is…

A French Yule Log!!!

In France you can buy two kinds of Yule log, either the Genoise and Buttercream type that that is rolled up (the one most of us are familiar with), or what is more commonly purchased which is a frozen Yule Log very reminiscent of an ice cream cake, only often it’s not made of ice cream but rather frozen mousse of some sort. In French this is called an entremets which is sometimes loosely translated in English as simply a cream dessert. This also means that this recipe is not holiday-specific, it is just a scrumptious dessert recipe. I had never heard of this other aparently more common yule log but then I've never actually eaten the rolly up kind either so there ya go.

This Yule log is made up of six components:
1) Dacquoise Biscuit
2) Mousse
3) Ganache Insert
4) Praline (Crisp) Insert
5) Creme Brulee Insert
6) Icing

In keeping with my recent focus I wanted to complete this challenge using only items in my pantry. I had to veganize the recipe anyway which required replacing a few eggs so I threw caution to the wind and dove in with whatever ideas struck me. There were definitely a few bumps in the road but this is what came of it.

Coconut Biscuit
Dark Chocolate Ganache
Cherry Almond Crisp
Coconut Mousse
Cherry Creme (which for some reason refused to freeze hence the droopiness of the layer)
White Chocolate Icing

Over all the flavor was good but it could use more tweeking to something really good and reliable. But I suppose that's what you get when you are throwing things together from your cupboards and fridge. Maybe next holiday I'll revisit this. Looking at other DB results you can see the possibilities are endless for flavor combinations as well as presentation. This battle is not over Sir Yule!

And now a closing word from our sponsor . . .
This month's challenge is brought to us by the adventurous Hilda from Saffron and Blueberry and Marion from Il en Faut Peu Pour Etre Heureux. They have chosen a French Yule Log by Flore from Florilege Gourmand.

Monday, December 1, 2008

Sugar Sugar

This month's challenge is Shuna Fish Lydon’s recipe for Caramel Cake with Caramelized Butter Frosting hosted by Dolores of Culinary Curiosity, Alex of Blondie and Brownie, and Jenny of Foray into Food. I managed a good result the first try which is great because these days I'm not finding myself with a lot of time (read here retail and holiday season) but I can't let that keep me from a potentially delicious Daring Bakers Challenge. Well I say potentially delicious but I have yet to experience a not delicious challenge so it's pretty much a sure thing at this point.
I followed the recipe pretty closely. First, I halved the recipe just to save the calories during this season of excess. My modifications to vegandom were:
-Earth Balance for the butter in both the cake and frosting
-1 Tb flax meal and 3-4 Tb water for the egg (remember I halved this recipe so you may want to double this for the original recipe which calls for 2 eggs)
-vanilla soy milk for the milk and I also omitted the vanilla since the soy milk already had this
-doubled the baking powder
-a little Mimic Cream in the frosting instead of the heavy cream

So as you can see the substitutions were fairly straight forward. I made mini cupcakes because I haven't made them in ages and they are super cute. To get into the holiday spirit I used gingerbread print ones. Aren't they adorable. I had to eat them right up. The cake came out very nice actually. Quite light in density as well as flavor. The frosting piled on the sugar but that's to be expected from frosting. I give this cake two frosting covered thumbs up.

Happy baking everyone!

Wednesday, October 29, 2008

Pizza Pizza

I almost miss those Little Caesars commercials.

It is almost as though the Daring Baker gods that be were smiling down on our VeganMoFo-ness. This month's challenge was another no-alterations-needed project. This month we were to make pizza but not just make a pizza. Make real authentic pizza dough and attempt to do the dough toss.

Looking at everyone else posting their favorite pizzas over the month it was so hard to hold back. Yes I could have shared my favorite toppings but to be honest I still haven't nailed down my perfect pizza. I also didn't want two posts to be nearly the same so I held back. This dough does put me a little closer to the perfect pizza.

The dough is made over the course of two days but don't let that put you off. It's not a quick recipe but it's not hard either.

BASIC PIZZA DOUGH
Original recipe taken from The Bread Baker’s Apprentice by Peter Reinhart.
Makes 6 pizza crusts (about 9-12 inches/23-30 cm in diameter).

4 1/2 cups all purpose flour, chilled
1 3/4 tsp Salt
1 tsp dry yeast
1/4 cup olive oil or vegetable oil
1 3/4 Cups water, ice cold (40° F/4.5° C)
1 Tb sugar
Semolina/durum flour or cornmeal for dusting

DAY ONE

1. Mix together the flour, salt and instant yeast in a big bowl (or in the bowl of your stand mixer).

2. Add the oil, sugar and cold water and mix well (with the help of a large wooden spoon or with the paddle attachment, on low speed) in order to form a sticky ball of dough. On a clean surface, knead for about 5-7 minutes, until the dough is smooth and the ingredients are homogeneously distributed. If it is too wet, add a little flour (not too much, though) and if it is too dry add 1 or 2 teaspoons extra water.
NOTE: If you are using an electric mixer, switch to the dough hook and mix on medium speed for the same amount of time.The dough should clear the sides of the bowl but stick to the bottom of the bowl. If the dough is too wet, sprinkle in a little more flour, so that it clears the sides. If, on the contrary, it clears the bottom of the bowl, dribble in a teaspoon or two of cold water.
The finished dough should be springy, elastic, and sticky, not just tacky, and register 50°-55° F/10°-13° C.


3. Flour a work surface or counter. Line a jelly pan with baking paper/parchment. Lightly oil the paper.

4. With the help of a metal or plastic dough scraper, cut the dough into 6 equal pieces (or larger if you want to make larger pizzas).

5. Sprinkle some flour over the dough. Make sure your hands are dry and then flour them. Gently round each piece into a ball.
NOTE: If the dough sticks to your hands, then dip your hands into the flour again.

6. Transfer the dough balls to the lined jelly pan and mist them generously with spray oil. Slip the pan into plastic bag or enclose in plastic food wrap.

7. Put the pan into the refrigerator and let the dough rest overnight or for up to thee days.
NOTE: You can store the dough balls in a zippered freezer bag if you want to save some of the dough for any future baking. In that case, pour some oil(a few tablespooons only) in a medium bowl and dip each dough ball into the oil, so that it is completely covered in oil. Then put each ball into a separate bag. Store the bags in the freezer for no longer than 3 months. The day before you plan to make pizza, remember to transfer the dough balls from the freezer to the refrigerator.

DAY TWO

8. On the day you plan to eat pizza, exactly 2 hours before you make it, remove the desired number of dough balls from the refrigerator. Dust the counter with flour and spray lightly with oil. Place the dough balls on a floured surface and sprinkle them with flour. Dust your hands with flour and delicately press the dough into disks about 1/2 inch/1.3 cm thick and 5 inches/12.7 cm in diameter. Sprinkle with flour and mist with oil. Loosely cover the dough rounds with plastic wrap and then allow to rest for 2 hours.

9. At least 45 minutes before making the pizza, place a baking stone on the lower third of the oven if you have one. Preheat the oven as hot as possible (500° F/260° C).
NOTE: If you do not have a baking stone, then use the back of a jelly pan. Do not preheat the pan.

10. Generously sprinkle the back of a jelly pan with semolina/durum flour or cornmeal. Flour your hands (palms, backs and knuckles). Take 1 piece of dough by lifting it with a pastry scraper. Lay the dough across your fists in a very delicate way and carefully stretch it by bouncing it in a circular motion on your hands, and by giving it a little stretch with each bounce. Once the dough has expanded outward, move to a full toss.

NOTE: Make only one pizza at a time.
During the tossing process, if the dough tends to stick to your hands, lay it down on the floured counter and reflour your hands, then continue the tossing and shaping.
In case you would be having trouble tossing the dough or if the dough never wants to expand and always springs back, let it rest for approximately 5-20 minutes in order for the gluten to relax fully,then try again.
You can also resort to using a rolling pin, although it isn’t as effective as the toss method.


11. When the dough has the shape you want (about 9-12 inches/23-30 cm in diameter - for a 6 ounces/180g piece of dough), place it on the back of the jelly pan, making sure there is enough semolina/durum flour or cornmeal to allow it to slide and not stick to the pan.

12. Lightly top it with sweet or savory toppings of your choice.

13. Slide the garnished pizza onto the stone in the oven or bake directly on the jelly pan. Close the door and bake for abour 5-8 minutes.

14. Take the pizza out of the oven and transfer it to a cutting board or your plate. In order to allow the cheese to set a little, wait 3-5 minutes before slicing or serving.


--------------------------------------------------
Now I've never tossed a pizza dough and as it turns out my dough is a little soft so it's all too willing to be stretched. I got in a couple little bounces on the knuckles before it was ready to go. Any more and I would have been wearing dough bracelets. So that explains the wonky look of my pizzas. I made only two of the six for now. The remaining four doughs are in the freezer for another day so maybe I'll have better luck by the end of those.
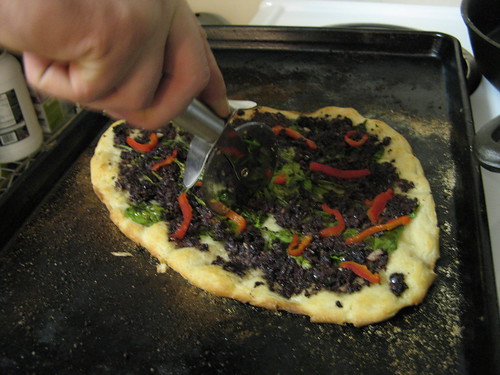
This first dough was topped with roasted red pepper hummus, baby spinach, slivers of garlic, seitan strips and a sprinkling of oregano and basil.Pizza number two was topped with baby spinach (can't get enough of the green stuff), olive muffeletta (check out the Vcon recipe!), strips of roasted red peppers. This one was my fave. Oh god I love olives.

Sunday, September 28, 2008

Daring Lavash

This had to be the most relaxed Daring Bakers Challenge yet. Why? Not because it was something I've made before, it wasn't. Not because it was done in 5 minutes, it wasn't. This challenge was all vegan. Yup, that's what I said. All vegan. No alterations necessary. The challenge for September was lavash crackers, an Armenian style of yeasted cracker.

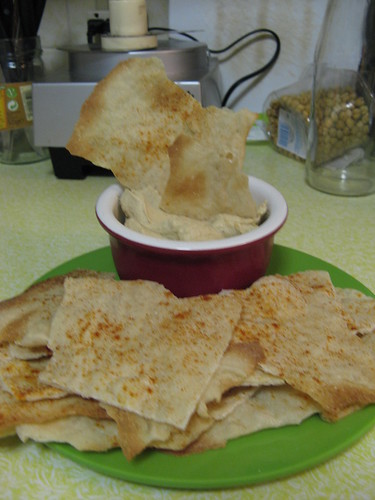
I was ever so slightly worried about rolling out this dough. The instructions say the thinner the better except I am dough challenged. Everyone knows that. I just went for it. Mix the dough, knead for 10ish minutes, let rise then stretch/roll. I had nothing to worry about, this dough is awesome, so stretchy and supple. I actually had enough dough for two trays rather than the one the recipe claims. I served my lavash with good ol' hummus. You really can't go wrong there.
Lavash Crackers
Recipe from The Bread Baker's Apprentice: Mastering The Art of Extraordinary Bread, by Peter Reinhart


1 1/2 cups unbleached bread flour
1/2 tsp salt
1/2 tsp instant yeast
1 Tb agave syrup or sugar
1 Tb vegetable oil
1/3 to 1/2 cup + 2 Tb water, at room temperature
Poppy seeds, sesame seeds, paprika, cumin seeds, caraway seeds, or kosher salt for toppings

1. In a mixing bowl, stir together the flour, salt yeast, agave, oil, and just enough water to bring everything together into a ball. You may not need the full 1/2 cup + 2 Tb of water, but be prepared to use it all if needed.

2. Sprinkle some flour on the counter and transfer the dough to the counter. Knead for about 10 minutes, or until the ingredients are evenly distributed. The dough should pass the windowpane test (see http://www.wikihow.com/Determine-if-Bre … ong-Enough for a discription of this) and register 77 degrees to 81 degrees Fahrenheit. The dough should be firmer than French bread dough, but not quite as firm as bagel dough (what I call medium-firm dough), satiny to the touch, not tacky, and supple enough to stretch when pulled. Lightly oil a bowl and transfer the dough to the bowl, rolling it around to coat it with oil. Cover the bowl with plastic wrap.

3. Ferment at room temperature for 90 minutes, or until the dough doubles in size. (You can also retard the dough overnight in the refrigerator immediately after kneading or mixing).

4. Mist the counter lightly with spray oil and transfer the dough to the counter. Press the dough into a square with your hand and dust the top of the dough lightly with flour. Roll it out with a rolling pin into a paper thin sheet about 15 inches by 12 inches. You may have to stop from time to time so that the gluten can relax. At these times, lift the dough from the counter and wave it a little, and then lay it back down. Cover it with a towel or plastic wrap while it relaxes. When it is the desired thinness, let the dough relax for 5 minutes. Line a sheet pan with baking parchment. Carefully lift the sheet of dough and lay it on the parchment. If it overlaps the edge of the pan, snip off the excess with scissors.

5. Preheat the oven to 350 degrees Fahrenheit with the oven rack on the middle shelf. Mist the top of the dough with water and sprinkle a covering of seeds or spices on the dough (such as alternating rows of poppy seeds, sesame seeds, paprika, cumin seeds, caraway seeds, kosher or pretzel salt, etc.) Be careful with spices and salt - a little goes a long way. If you want to precut the cracker, use a pizza cutter (rolling blade) and cut diamonds or rectangles in the dough. You do not need to separate the pieces, as they will snap apart after baking. If you want to make shards, bake the sheet of dough without cutting it first.

6. Bake for 15 to 20 minutes, or until the crackers begin to brown evenly across the top (the time will depend on how thinly and evenly you rolled the dough).

7. When the crackers are baked, remove the pan from the oven and let them cool in the pan for about 10 minutes. You can then snap them apart or snap off shards and serve.

Sunday, August 31, 2008

Teeny Tiny Itsy Bitsy

August comes to a close and another Daring Bakers Challenge also comes to an end. This month brought me yet another delicious dessert I had never made before, chocolate eclairs. Now that I think on it I don't think I ever ate one pregan so this was extra special.

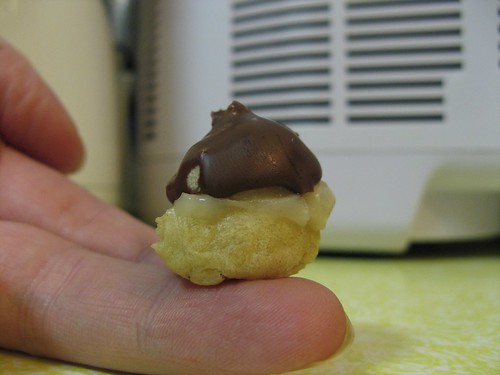
I started out in search of a vegan pate a choux recipe. I luckily found my match at Baking Love. The dough came together rather quickly and without much fuss. I ended up using this dough to make the most teeny tiny food yet. To make these really small just use a pastry bag with a large tip to pipe the dough onto the baking sheet into mini puffs or lil' eclairs. These will expand a little but not tons so you can gauge the size of your puff well by the raw dough.


Pate a Choux

1 cup all purpose flour
2 tsp sugar
1/4 tsp salt
1/4 teaspoon cream of tartar or baking powder
2 Tb shortening or oil
1 cup non-dairy milk
2 Tb Ener-G egg replacer whipped until stiff with 1/3 cup water

Preheat oven to 400 and prepare a baking sheet with parchment paper.

Prepare Ener-G egg replacer & water.

Stir together flour, vegan sugar, salt, and cream of tartar. In a saucepan, bring the non-dairy milk and oil to a boil, stirring constantly. Add the flour mixture all at once, return to heat, and reduce the heat to low. Stir constantly until the dough forms a ball that pulls away from the sides and the spoon and is smooth. Working quickly, remove from heat and add the egg replacer in thirds, beating well after each addition until the dough is glossy, smooth, and pulls away from the sides.


Using a pastry bag, dispense the choux paste onto baking tray. Alternatively, you may use two spoons to form eclair shapes or simply drop spoonfuls to form puffs.

Bake for 10 minutes at 400F, then lower the heat to 350F for another 10 minutes. Turn oven off and allow to cool, with door slightly ajar, for another 20 minutes. Allow to cool completely on racks before serving or filling.

Custard

1/3 c sugar
2 Tb flour
1/4 c cornstarch
1/4 c water
1 1/3 c nondairy milk
1 tsp vanilla

Combine sugar, flour, starch and water in a blender and blend until smooth, transfer to a bowl or measuring cup. Alternatively combine in a bowl and beat until smooth.

In a medium saucepan bring milk to a simmer over medium high heat. Pour about 1/2 c of the hot milk into the sugar mixture and whisk to combine. Add this mixture into the saucepan with the remaining hot milk. Heat this mixture over medium low heat whisking constantly until it begins to bubble. Remove from heat.

Transfer to a bowl and cover to cool to room temperature. Store in refrigerator until ready to use.

Chocolate Glaze

100g (3.5 oz) bar semisweet chocolate
1 tsp vegetable shortening (optional)

Melt chocolate and shortening in double boiler stirring until smooth.

Assembly

Split your pastries on the horizontal. Place bottoms aside and the tops on a rack over parchment.
Glaze should be barely warm, pour or spoon over tops to cover each evenly.
Pipe or spoon custard into the bottoms, don't be afraid to mound it up.
Place tops over the custard and enjoy!


Wednesday, July 30, 2008

That little special something

It is that time again for another Daring Bakers Challenge. I missed last month so I wanted this challenge not only to be successful but special. Something I can really be proud of. This resulted in a sloppy first attempt but I learned enough from that (and still managed a really tasty result) my second attempt was much easier.

I now know what it is that gives so many gourmet deserts that over the top deliciousness, booze. That special something, yeah, that's rum. But really, I do need to learn to decorate my cakes. The beauty of the outside never matches the beautiful taste of the inside.

So without anymore ramblings and delays I present my July Challenge:

Hazelnut Gateau with Praline Buttercream

For this recipe you will need several elements. It looks like a lot of work but it's worth it. Really. As usual I have modified the original version of this recipe to fit into my diet so we'll do without the heavy cream, the dozen or so eggs and the butter and replace them with things like flax, cashews, baking powder and vegan non-hydrogenated margarine (using a hydrogenated variety would of course work but please don't).

filbert genoise
sugar syrup, flavored with dark rum
praline buttercream
cashew whipped cream

apricot glaze
ganache glaze, prepared just before ready to use
hazelnuts, toasted for decoration if you'd like

Filbert Genoise

1cup hazelnuts, toasted & skinned
1 1/4 cup all purpose flour
2 Tb cornstarch
1 tsp baking powder
1 tsp baking soda
5 Tb flax meal
1/2 cup water
1 cup sugar
1 tsp vanilla extract
Juice of 1 lemon
1/2 tsp grated lemon zest
1/4 cup warm earth balance (or your choice of vegetable margarine)

Position oven rack to the center of oven. Preheat to 350 degrees. Grease & flour three 8" round cake pans (you can also do this on a jelly roll pan, you may also want to use parchment, this does tend to stick).

Using a food processor, process nuts, flour, cornstarch, baking powder & soda for about 30 seconds. Until nuts are reduced to a powder. Set aside.

Beat flax meal and water together, mixture should thicken slightly. Add sugar, vanilla, lemon zest and lemon juice. Beat until well mixed. Add warm earth balance, beat to incorporate. Add flour and nut mixture and mix just until dry ingredients are moistened and combined.

Spread batter onto prepared pans dividing evenly. It will just cover the bottom of three 8-9" pans. Bake for 20 minutes or until toothpick inserted in center comes out clean. Remove from oven, allow to rest slightly in pan and then remove to cool on cooling racks.

Sugar Syrup

1/2 cup water
2 Tb sugar
1 Tb dark rum

In a small saucepan, bring water and sugar to boil and simmer for 5 minutes. Remove from heat, add rum. Cool slightly before using on cake.

Praline Buttercream

1/2 cup vegetable shortening
1/2 cup vegetable margarine
1/3 cup praline paste (recipe follows)
1 1/2 tsp dark rum
1/4 cup soy creamer (or any nondairy milk)
3 1/2 cup confectioners sugar

Cream together shortening and margarine until well mixed and fluffy. Add praline paste, rum and creamer and beat until incorporated. Sift in confectioners sugar and beat until well mixed and fluffy.

Praline Paste

1 cup hazelnuts, toasted and skinned
2/3 cup sugar

Line jelly roll pan with parchment paper and lightly oil with margarine

Put sugar in heavy bottomed skillet. Heat on low for 10-20 minutes until sugar melts around the edges. Do not stir. Swirl if necessary to prevent burning. Brush sides of pan with water to remove sugar crystals if needed. When completely melted and carmel in color remove from heat.

Stir in nuts with a wooden spoon and separate clusters. Return o low heat and stir to coat. Cook until sugar bubbles. Turn mixture onto parchment and spread evenly. It will quickly harden into a brittle. Break into pieces and place in food processor. Process until mixture breaks down and comes together into a paste, several minutes.

Cashew Whipped Cream

1 cup cashews, soaked 1 hr or up to overnight
1/4 cup water
2 Tb agave nectar (or maple syrup)
1 tsp vanilla extract

Add all ingredients into blender or food processor and blend until smooth and creamy.

Apricot Glaze

2/3 c thick apricot preserves, lg pieces removed
1 Tb water

In small saucepan bring water and preserves to slow boil and simmer 2-3 minutes. Add water as needed to prevent sticking.
Remove from heat and apply to cake with pastry brush.

Ganache Glaze

6oz of semisweet or bittersweet choocolate (I used Lindt Swiss Bittersweet and Madagascar 65% Dark Bars)
6 oz (3/4 cup) soy creamer (or nondairy milk of choice)
1 Tb light corn syrup
1 Tb dark rum
3/4 tsp vanilla

Chop chocolate and place in a medium sized bowl.
Heat creamer and corn syrup in saucepan on low until it reaches a gentle boil. Immediately pour over chocolate. Allow to set for one minute then slowly stir and mix chocolate and cream together until melted and mixed. Blend in vanilla and rum. Glaze will thicken but should still be pourable.

Assembly

Cut a cardboard disc slightly smaller than the cake. Measure 1 cup praline buttercream and set aside.

Place first layer upside down on disk. Using a pastry brush, moisten with sugar syrup. Spread with half of the remaining buttercream and then cover with 1/2 cashew cream leaving 1/4 inch border around the edge of cake.

Place middle layer over first, brush with sugar syrup, spread with remaining buttercream and them cashew cream.

Moisten underside of final layer with sugar syrup and then place, syrup side down over middle layer. Gently press sides of cake to align layers. Refrigerate to chill 30 minutes.

Lift cake by sliding palm under cardboard. Holding a sharp, serrated knife parallel to sides of cake. Trim sides so they are perfectly straight. Brush top and sides of cake with warm apricot glaze, sealing cut areas completely. Chill while you prepare the ganache.

Place a rack over a large shallow pan to catch ganache drippings. Remove gateau from refrigerator and put on rack. With metal spatula in hand hold saucepan about 10 inches above cake, pour ganache onto cake's center. Move spatula over top 3-4 times to get a smooth and mirror like appearance. Ganache should cover top and run down sides.

Garnish with reserved buttercream and pastry bag as the mood strikes you.

Refrigerate leftovers.

Wednesday, May 28, 2008

L'Opera

And now for the May Daring Bakers Challenge, Opera Cake!


At first look. I thought this was going to take a few (or more) tries to veganize this little bugger. The recipe contained about a dozen eggs, some cream, some butter. What's a girl to do? Tackle the little egg laden booger one bit at a time.

The first bit is the cake layer, the joconde. This is traditionally a thin spongecake like layer. This is where most of the eggs came in so this was going to be the biggest challenge. I needed to find a suitable replacement for 6 lg eggs and 6 egg whites. I decided the best way to go about it would be to make up my own recipe while staying in the spirit of the original. Almond focus, light, airy. This is what I came up with.

Almond Cake
1 cup almond meal (you can make your own with a blender or food processor)
1 1/4 cup all purpose flour
1 cup whole wheat flour
1 tsp baking powder
1 tsp baking soda
1/2 tsp salt
1/2 cup vegetable oil (a nut oil will taste nice here but any would work)
2 cup almond milk (or your favorite milk alternative)
3/4 cup maple syrup
1 tsp apple cider vinegar
1 tsp lemon juice
1/2 tsp almond extract
1 tsp vanilla

Preheat oven to 350. Oil three 8" spring form pans or line cupcake tins (12-15)
Combine a
lmond meal, flours, baking powder, baking soda, and salt in a medium bowl. Set aside.
In a large bowl combine remaining ingredients using a hand mixer or whisk to fully mix. Add in dry ingredients mixing until fully incorporated.
Pour into prepared pans and bake 30 mins, until inserted toothpick comes out clean.


Next the syrup, this was easy. The recipe was already vegan and simple. Use this to drizzle into the cake.

Syrup
1/2 cup water
1/3 cup sugar
1 tsp-1 Tb flavoring of choice (I went with vanilla)

Stir all ingredients into small saucepan. Bring to boil. Remove from heat and cool to room temperature.

Buttercream, this also had some eggs in originally but I just leaned more towards a light fluffy frosting cream.

Buttercream
1/2 cup vegetable shortening
1/2 cup vegan margarine (such as Earth Balance)
2/3 cup powdered sugar
1 Tb vanilla
2 Tb melted vegan white chocolate

Beat together shortening and margarine in a large bowl until combined and fluffy. Sift in powdered sugar and beat again to incorporate. Finally add vanilla and white chocolate. Beat until fluffy smooth.

The mousse aspect was optional but who can forget the mousse. My mouth is watering just thinking about it.

Mousse
1/2 cup jam (I used half berry and half apricot)
1/2 tsp lemon juice
1 tsp agar powder
1/2 pkg (6oz) silken extra-firm tofu
1/4 tsp vanilla extract
2 Tb powdered sugar

In a small pot on medium-low heat, whisk together jam, lemon juice, and agar and bring to a slow boil. Cook for 3 minutes reducing heat to maintain slow boil to dissolve agar.
Meanwhile in food processor combine tofu, vanilla and powdered sugar and mix until smooth.
Add jam mixture and puree again. Refrigerate until completely cooled. Puree again when ready to use to make spreadable.

Then there's the glaze. This took a little work. I wanted a white chocolate glaze like the recipe called for but I had to order dairy free white chocolate. I went with a source I hadn't tried before, Chocolate Emporium. They don't contain any partial hydro nastiness (unless the label is wrong) so I'm pretty happy with them.

Glaze
3-4oz vegan white chocolate
3 Tb vegan creamer (soy creamer, mimiccream)

In a double boiler melt white chocolate with creamer. Stir until smooth. Add more creamer to reach pour-able consistancy.

Assembly should go something like this.
If you have springform layers.
Layer: cake-syrup-buttercream-cake-syrup-buttercream-cake-syrup-mousse-glaze.
If you have cupcakes.
Cut each cupcake into three layers (see photo for example) and layer each item as listed above. I chose to add the glaze under the mousse.

Sunday, May 4, 2008

Cheesecake Pops are evil!

Better slightly late than never. The April Challenge, my first. And challenge it was. I'm a little late posting so let's get on with it. This month's challenge was a recipe from Sticky, Chewy, Messy, Gooey by Jill O'Connor.
I wanted to stay as true to the original recipe as possible. So a basic veganization. My altered recipe follows.
Cheesecake Pops
Makes 30 – 40 Pops

5 8-oz. packages tofutti cream cheese at room temperature
2 cups sugar
¼ cup all-purpose flour
¼ teaspoon salt
1 pkg extra firm silken tofu
2 teaspoons pure vanilla extract
Boiling water as needed
Thirty to forty 8-inch lollipop sticks
1 pound chocolate, finely chopped
2 tablespoons vegetable shortening
Assorted decorations such as chopped nuts, colored jimmies, crushed peppermints, mini chocolate chips, sanding sugars, dragees) - Optional

Position oven rack in the middle of the oven and preheat to 325 degrees F. Set some water to boil.

In a large bowl, beat together the cream cheese, flour, and salt until smooth.
Using a mixer, mix on low speed in another bowl the tofu, sugar & vanilla.
Beat the two together.
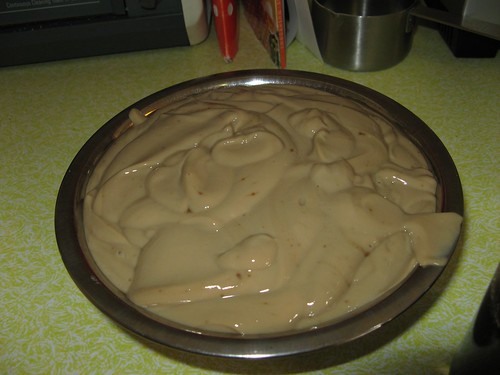
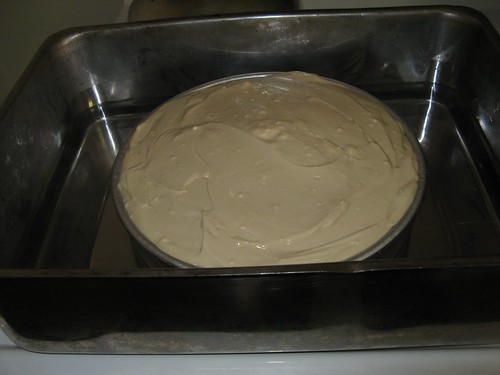
Grease a 10-inch cake pan (not a springform pan), and pour the batter into the cake pan. Place the pan in a larger roasting pan. Fill the roasting pan with the boiling water until it reaches halfway up the sides of the cake pan. Bake until the cheesecake is firm and slightly golden on top, 35 to 45 minutes.
Remove the cheesecake from the water bath and cool to room temperature. Cover the cheesecake with plastic wrap and refrigerate until very cold, at least 3 hours or up to overnight. You may need to lightly freeze to firm the cake up enough to scoop.

When the cheesecake is cold and very firm, scoop the cheesecake into 2-ounce balls and place on a parchment paper-lined baking sheet. Carefully insert a lollipop stick into each cheesecake ball. Freeze the cheesecake pops, uncovered, until very hard, at least 1 – 2 hours.

When the cheesecake pops are frozen and ready for dipping, prepare the chocolate. In the top of a double boiler, set over simmering water, or in a heatproof bowl set over a pot of simmering water, heat half the chocolate and half the shortening, stirring often, until chocolate is melted and chocolate and shortening are combined. Stir until completely smooth. Do not heat the chocolate too much or your chocolate will lose it’s shine after it has dried. Save the rest of the chocolate and shortening for later dipping, or use another type of chocolate for variety.

Quickly dip a frozen cheesecake pop in the melted chocolate, swirling quickly to coat it completely. Shake off any excess into the melted chocolate. If you like, you can now roll the pops quickly in optional decorations. You can also drizzle them with a contrasting color of melted chocolate (dark chocolate drizzled over milk chocolate or white chocolate over dark chocolate, etc.) Place the pop on a clean parchment paper-lined baking sheet to set. Repeat with remaining pops, melting more chocolate and shortening (or confectionary chocolate pieces) as needed.

Refrigerate the pops for up to 24 hours, until ready to serve.
They aren't all that pretty. I didn't really get the chance to decorate these. They were too delicious and didn't last long at all. The recipe could use a little tweaking. I may revisit this again to perfect it as they would be a great treat to share. Mega yum!