Saturday, August 16, 2008

Ice Cream!

So I managed to get my hands on a new kitchen gadget. I've never had an ice cream maker and never used one before but after reading a few reviews I knew it would be a pretty safe purchase. I went for the Cuisinart with their reputation and most people seemed to like it over all. I've used it a couple times now and I have to say. This is a good machine. It does exactly what it should. It's not overly loud and as long as you follow the directions you have ice cream in 30 mins to 1 hr.

I haven't come up with a library of recipes yet but believe you me they will be coming. I love this thing! Vegan ice cream pretty much whenever I want it. No added crap. Flavors that may be hard to find, or impossible in vegan versions. Oh yes, there will be much ice cream. I suspect I will go back up to the pant size I just went down from. Who the hell thinks vegans are skinny?

My first creation you ask? This recipe was inspired by my husbands pregan love for Haagen Dazs Rum Raisin ice cream and my stumbling across the blog A Vegan Ice Cream Paradise made this my first "complex" recipe. I say complex lightly because it wasn't difficult. Yes, it can be improved but this came out damn good. I'd buy it.
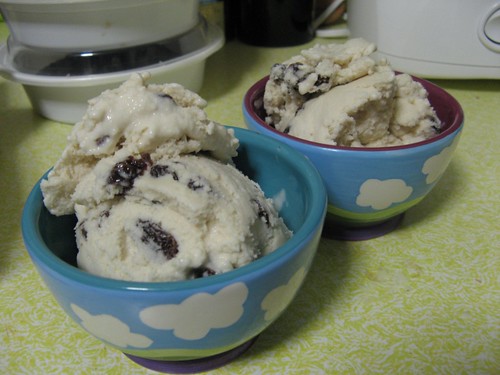


Rum Raisin Ice Cream

3/4 cup raisins
3/4 cup dark rum
1
14oz can coconut milk
1 1/5 cup soy milk (or other nondairy milk)
1/2 cup sugar
2 Tb arrowroot (or cornstarch)
1 tsp vanilla

Soak the raisins in the rum for at least 1 hour but up to overnight. The longer you soak the better.
Mix 1/4 cup of the soymilk with the arrowroot, set aside.
Heat the coconut milk, remaining soy milk and sugar in a small saucepan. Once the mixture is near a boil mix in the arrowroot mixture. The mixture should begin to thicken. Once this happens remove from heat and stir in vanilla. Set aside to cool.

Once the mixture has reached room temperature, drain the raisins reserving 1/4 cup of the rum.
Mix the rum into the milk mixture.
Freeze the cream in your ice cream maker according to the instructions. Add the raisins in 5 mins before the end of the freezing cycle.

I had to freeze mine in the freezer for an additional 10 mins to get a scoopable ice cream rather than a soft serve consistency.

Wednesday, July 30, 2008

That little special something

It is that time again for another Daring Bakers Challenge. I missed last month so I wanted this challenge not only to be successful but special. Something I can really be proud of. This resulted in a sloppy first attempt but I learned enough from that (and still managed a really tasty result) my second attempt was much easier.

I now know what it is that gives so many gourmet deserts that over the top deliciousness, booze. That special something, yeah, that's rum. But really, I do need to learn to decorate my cakes. The beauty of the outside never matches the beautiful taste of the inside.

So without anymore ramblings and delays I present my July Challenge:

Hazelnut Gateau with Praline Buttercream

For this recipe you will need several elements. It looks like a lot of work but it's worth it. Really. As usual I have modified the original version of this recipe to fit into my diet so we'll do without the heavy cream, the dozen or so eggs and the butter and replace them with things like flax, cashews, baking powder and vegan non-hydrogenated margarine (using a hydrogenated variety would of course work but please don't).

filbert genoise
sugar syrup, flavored with dark rum
praline buttercream
cashew whipped cream

apricot glaze
ganache glaze, prepared just before ready to use
hazelnuts, toasted for decoration if you'd like

Filbert Genoise

1cup hazelnuts, toasted & skinned
1 1/4 cup all purpose flour
2 Tb cornstarch
1 tsp baking powder
1 tsp baking soda
5 Tb flax meal
1/2 cup water
1 cup sugar
1 tsp vanilla extract
Juice of 1 lemon
1/2 tsp grated lemon zest
1/4 cup warm earth balance (or your choice of vegetable margarine)

Position oven rack to the center of oven. Preheat to 350 degrees. Grease & flour three 8" round cake pans (you can also do this on a jelly roll pan, you may also want to use parchment, this does tend to stick).

Using a food processor, process nuts, flour, cornstarch, baking powder & soda for about 30 seconds. Until nuts are reduced to a powder. Set aside.

Beat flax meal and water together, mixture should thicken slightly. Add sugar, vanilla, lemon zest and lemon juice. Beat until well mixed. Add warm earth balance, beat to incorporate. Add flour and nut mixture and mix just until dry ingredients are moistened and combined.

Spread batter onto prepared pans dividing evenly. It will just cover the bottom of three 8-9" pans. Bake for 20 minutes or until toothpick inserted in center comes out clean. Remove from oven, allow to rest slightly in pan and then remove to cool on cooling racks.

Sugar Syrup

1/2 cup water
2 Tb sugar
1 Tb dark rum

In a small saucepan, bring water and sugar to boil and simmer for 5 minutes. Remove from heat, add rum. Cool slightly before using on cake.

Praline Buttercream

1/2 cup vegetable shortening
1/2 cup vegetable margarine
1/3 cup praline paste (recipe follows)
1 1/2 tsp dark rum
1/4 cup soy creamer (or any nondairy milk)
3 1/2 cup confectioners sugar

Cream together shortening and margarine until well mixed and fluffy. Add praline paste, rum and creamer and beat until incorporated. Sift in confectioners sugar and beat until well mixed and fluffy.

Praline Paste

1 cup hazelnuts, toasted and skinned
2/3 cup sugar

Line jelly roll pan with parchment paper and lightly oil with margarine

Put sugar in heavy bottomed skillet. Heat on low for 10-20 minutes until sugar melts around the edges. Do not stir. Swirl if necessary to prevent burning. Brush sides of pan with water to remove sugar crystals if needed. When completely melted and carmel in color remove from heat.

Stir in nuts with a wooden spoon and separate clusters. Return o low heat and stir to coat. Cook until sugar bubbles. Turn mixture onto parchment and spread evenly. It will quickly harden into a brittle. Break into pieces and place in food processor. Process until mixture breaks down and comes together into a paste, several minutes.

Cashew Whipped Cream

1 cup cashews, soaked 1 hr or up to overnight
1/4 cup water
2 Tb agave nectar (or maple syrup)
1 tsp vanilla extract

Add all ingredients into blender or food processor and blend until smooth and creamy.

Apricot Glaze

2/3 c thick apricot preserves, lg pieces removed
1 Tb water

In small saucepan bring water and preserves to slow boil and simmer 2-3 minutes. Add water as needed to prevent sticking.
Remove from heat and apply to cake with pastry brush.

Ganache Glaze

6oz of semisweet or bittersweet choocolate (I used Lindt Swiss Bittersweet and Madagascar 65% Dark Bars)
6 oz (3/4 cup) soy creamer (or nondairy milk of choice)
1 Tb light corn syrup
1 Tb dark rum
3/4 tsp vanilla

Chop chocolate and place in a medium sized bowl.
Heat creamer and corn syrup in saucepan on low until it reaches a gentle boil. Immediately pour over chocolate. Allow to set for one minute then slowly stir and mix chocolate and cream together until melted and mixed. Blend in vanilla and rum. Glaze will thicken but should still be pourable.

Assembly

Cut a cardboard disc slightly smaller than the cake. Measure 1 cup praline buttercream and set aside.

Place first layer upside down on disk. Using a pastry brush, moisten with sugar syrup. Spread with half of the remaining buttercream and then cover with 1/2 cashew cream leaving 1/4 inch border around the edge of cake.

Place middle layer over first, brush with sugar syrup, spread with remaining buttercream and them cashew cream.

Moisten underside of final layer with sugar syrup and then place, syrup side down over middle layer. Gently press sides of cake to align layers. Refrigerate to chill 30 minutes.

Lift cake by sliding palm under cardboard. Holding a sharp, serrated knife parallel to sides of cake. Trim sides so they are perfectly straight. Brush top and sides of cake with warm apricot glaze, sealing cut areas completely. Chill while you prepare the ganache.

Place a rack over a large shallow pan to catch ganache drippings. Remove gateau from refrigerator and put on rack. With metal spatula in hand hold saucepan about 10 inches above cake, pour ganache onto cake's center. Move spatula over top 3-4 times to get a smooth and mirror like appearance. Ganache should cover top and run down sides.

Garnish with reserved buttercream and pastry bag as the mood strikes you.

Refrigerate leftovers.

Sunday, July 6, 2008

A Return from the Greek Isles

Yes, it's been a while. In general I go through phases of unfocus or maybe narrow focus. I go through each day doing the basics: eat, sleep, work, repeat. This causes everything to be neglected. Blog posts most of all. However this time I do have a real excuse. At about the time of my last post I was on my way to Montreal to fly from there to Athens Greece. We returned a couple weeks ago but I am only now getting my head back in the game.

It's so disorienting to be away for long enough to settle into a different community and pace of life and then come back here. Now Burlington is pretty chilled out when compared to other "cities" but the Greeks have the market cornered on chilled out. Even in a busy city like Athens where there are tons of cars and bikes on each street just sit down to a meal and everything just slows right down.

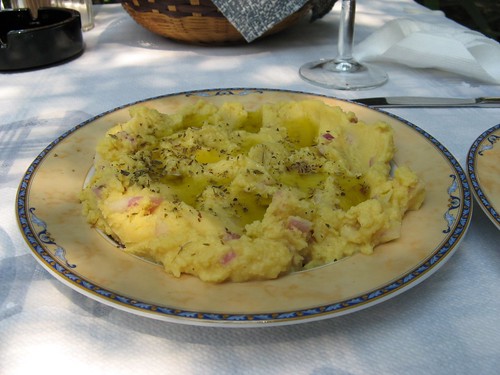
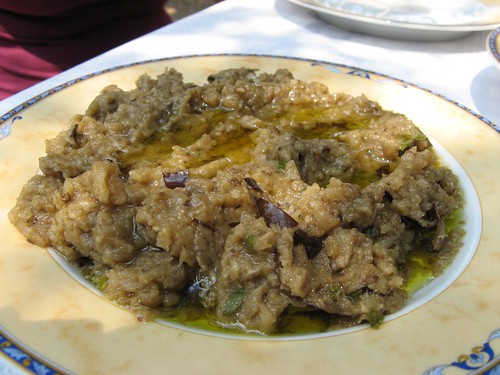
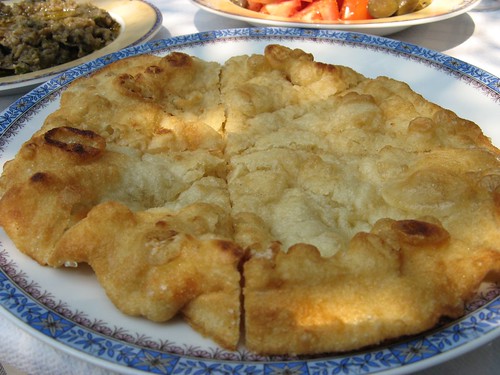
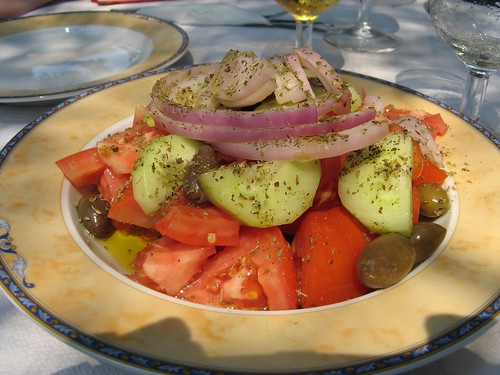
My husband's parents live on the little island of Ithaki (I'll have to add some links as I find them) in the Ionian Sea. My pictures so far are of the food from our favorite restaurant Polyphemus. Set in a garden so you are completely surrounded by olive and lemon trees, herbs and some vegetables and just lots of beautiful green and splashes of color in flowers.

The Greek version of hummus, this is fava. Made from yellow split peas, olive oil, garlic, red onion. On top drizzle some bright green olive oil and a sprinkling of oregano. I've tried to make this a couple times but haven't quite got the taste right. I'll post a recipe when I figure it out.

Another favorite of ours (we ate it nearly everyday in one form or another), Melitzanosalata. This is an eggplant salad made from roasted eggplant, garlic and olive oil primarily. Depending on which restaurant you are at it's always different. This has been left a little chunky and has a healthy dose of garlic and drizzling of that gorgeous olive oil. I am closer to a recipe on this one.
This is simply a fried pita. I haven't seen this offered at any other restaurant we visited but damn this just makes eating those dips heaven.
And no meal is complete without the classic Greek salad, without the feta of course. The vegetables were always just so perfect here. Tomatoes just so big and juicy. Olives a plenty. The greenest olive oil I have ever seen and probably ever will see.


Wednesday, May 28, 2008

L'Opera

And now for the May Daring Bakers Challenge, Opera Cake!


At first look. I thought this was going to take a few (or more) tries to veganize this little bugger. The recipe contained about a dozen eggs, some cream, some butter. What's a girl to do? Tackle the little egg laden booger one bit at a time.

The first bit is the cake layer, the joconde. This is traditionally a thin spongecake like layer. This is where most of the eggs came in so this was going to be the biggest challenge. I needed to find a suitable replacement for 6 lg eggs and 6 egg whites. I decided the best way to go about it would be to make up my own recipe while staying in the spirit of the original. Almond focus, light, airy. This is what I came up with.

Almond Cake
1 cup almond meal (you can make your own with a blender or food processor)
1 1/4 cup all purpose flour
1 cup whole wheat flour
1 tsp baking powder
1 tsp baking soda
1/2 tsp salt
1/2 cup vegetable oil (a nut oil will taste nice here but any would work)
2 cup almond milk (or your favorite milk alternative)
3/4 cup maple syrup
1 tsp apple cider vinegar
1 tsp lemon juice
1/2 tsp almond extract
1 tsp vanilla

Preheat oven to 350. Oil three 8" spring form pans or line cupcake tins (12-15)
Combine a
lmond meal, flours, baking powder, baking soda, and salt in a medium bowl. Set aside.
In a large bowl combine remaining ingredients using a hand mixer or whisk to fully mix. Add in dry ingredients mixing until fully incorporated.
Pour into prepared pans and bake 30 mins, until inserted toothpick comes out clean.


Next the syrup, this was easy. The recipe was already vegan and simple. Use this to drizzle into the cake.

Syrup
1/2 cup water
1/3 cup sugar
1 tsp-1 Tb flavoring of choice (I went with vanilla)

Stir all ingredients into small saucepan. Bring to boil. Remove from heat and cool to room temperature.

Buttercream, this also had some eggs in originally but I just leaned more towards a light fluffy frosting cream.

Buttercream
1/2 cup vegetable shortening
1/2 cup vegan margarine (such as Earth Balance)
2/3 cup powdered sugar
1 Tb vanilla
2 Tb melted vegan white chocolate

Beat together shortening and margarine in a large bowl until combined and fluffy. Sift in powdered sugar and beat again to incorporate. Finally add vanilla and white chocolate. Beat until fluffy smooth.

The mousse aspect was optional but who can forget the mousse. My mouth is watering just thinking about it.

Mousse
1/2 cup jam (I used half berry and half apricot)
1/2 tsp lemon juice
1 tsp agar powder
1/2 pkg (6oz) silken extra-firm tofu
1/4 tsp vanilla extract
2 Tb powdered sugar

In a small pot on medium-low heat, whisk together jam, lemon juice, and agar and bring to a slow boil. Cook for 3 minutes reducing heat to maintain slow boil to dissolve agar.
Meanwhile in food processor combine tofu, vanilla and powdered sugar and mix until smooth.
Add jam mixture and puree again. Refrigerate until completely cooled. Puree again when ready to use to make spreadable.

Then there's the glaze. This took a little work. I wanted a white chocolate glaze like the recipe called for but I had to order dairy free white chocolate. I went with a source I hadn't tried before, Chocolate Emporium. They don't contain any partial hydro nastiness (unless the label is wrong) so I'm pretty happy with them.

Glaze
3-4oz vegan white chocolate
3 Tb vegan creamer (soy creamer, mimiccream)

In a double boiler melt white chocolate with creamer. Stir until smooth. Add more creamer to reach pour-able consistancy.

Assembly should go something like this.
If you have springform layers.
Layer: cake-syrup-buttercream-cake-syrup-buttercream-cake-syrup-mousse-glaze.
If you have cupcakes.
Cut each cupcake into three layers (see photo for example) and layer each item as listed above. I chose to add the glaze under the mousse.

Saturday, May 10, 2008

Couscous Cake?

Looking though some food porn on the ppk I came across a thread featuring couscous cake. I was intrigued. What is this couscous cake you speak of? What a strange idea. After looking at the photo and reading the post I realize that I have a recipe for a couscous cake in a cookbook that I have recently purchased, Vegan Planet. Now this is not a small book so I wasn't surprised in the least that I missed this particular recipe. Also in general I am not a Pumpkin fan. Well it's alright but I have never liked pumpkin pie. How un-American of me, I know. Anyway, also included in this post is a reference to a contest hosted by Robin Robertson on her Vegan Planet blog. "Alright I'm in!" I think. I'm such a sucker. A contest is as good an excuse as any to try out a new and, to me, unusual concept in cooking.

As it turns out couscous cake is a super easy thing to make. Also super quick and super versatile. As this was the first trial of said cake I wanted to keep things simple. I decided to go with the smooth delicate flavor of coconut as it would pair nicely with the fresh fruit I had on hand already. So without further adieu. My couscous cake recipe.


Coconut Vanilla Bean Couscous Cake

1 15oz can coconut milk
1/2 cup water
1/4-1/3 cup sugar
1 Tb arrowroot powder (or cornstarch)
1 vanilla bean
2 cups whole wheat couscous

In a medium saucepan heat coconut milk, water, sugar and arrowroot over medium high heat, whisking to fully mix in the arrowroot. Meanwhile scrape out vanilla bean seeds and add to pot. Whisk to incorporate seeds. Toss in the vanilla bean pod as well, this will also add to the vanilla flavor. Once the mixture comes to a boil stir in couscous, cover and simmer for about 1-2 minutes then remove from heat and set aside for 10 minutes.

Meanwhile lightly oil a 8" spring form pan, this is to mold the couscous into cake form. You may try something else if you'd like, this cake comes out fairly firm and cohesive.

After 10 minutes, remove the lid to your pot. Your couscous should have absorbed the liquid. Gently stir the couscous to locate the vanilla beans and pull those out. Now dump the mixture into your prepared spring form pan. Press and smooth down the mixture. Cover and chill until fully cooled through, at least 1-2 hrs.

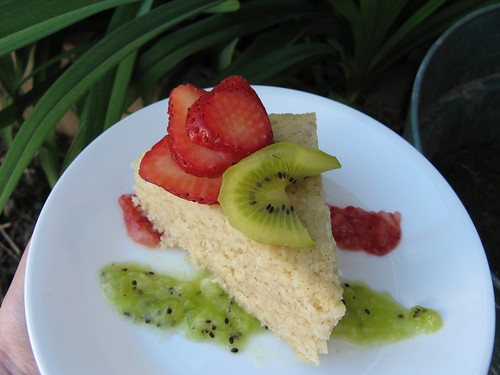
Remove from refrigerator and you can now remove the spring form pan. Slice and serve like a regular cake garnishing with sauce and/or fruit of your choosing. This cake comes out light with a smooth vanilla coconut flavor that will compliment just about anything you dream up. I paired mine with strawberries and kiwi.

Sunday, May 4, 2008

Cheesecake Pops are evil!

Better slightly late than never. The April Challenge, my first. And challenge it was. I'm a little late posting so let's get on with it. This month's challenge was a recipe from Sticky, Chewy, Messy, Gooey by Jill O'Connor.
I wanted to stay as true to the original recipe as possible. So a basic veganization. My altered recipe follows.
Cheesecake Pops
Makes 30 – 40 Pops

5 8-oz. packages tofutti cream cheese at room temperature
2 cups sugar
¼ cup all-purpose flour
¼ teaspoon salt
1 pkg extra firm silken tofu
2 teaspoons pure vanilla extract
Boiling water as needed
Thirty to forty 8-inch lollipop sticks
1 pound chocolate, finely chopped
2 tablespoons vegetable shortening
Assorted decorations such as chopped nuts, colored jimmies, crushed peppermints, mini chocolate chips, sanding sugars, dragees) - Optional

Position oven rack in the middle of the oven and preheat to 325 degrees F. Set some water to boil.

In a large bowl, beat together the cream cheese, flour, and salt until smooth.
Using a mixer, mix on low speed in another bowl the tofu, sugar & vanilla.
Beat the two together.
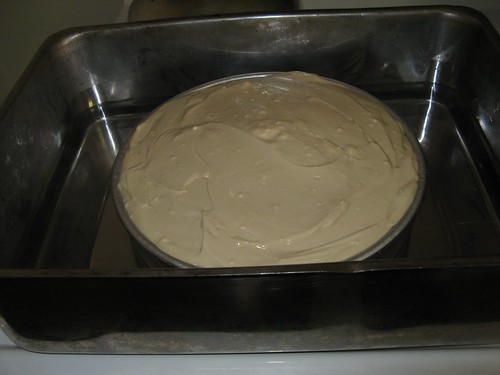
Grease a 10-inch cake pan (not a springform pan), and pour the batter into the cake pan. Place the pan in a larger roasting pan. Fill the roasting pan with the boiling water until it reaches halfway up the sides of the cake pan. Bake until the cheesecake is firm and slightly golden on top, 35 to 45 minutes.
Remove the cheesecake from the water bath and cool to room temperature. Cover the cheesecake with plastic wrap and refrigerate until very cold, at least 3 hours or up to overnight. You may need to lightly freeze to firm the cake up enough to scoop.

When the cheesecake is cold and very firm, scoop the cheesecake into 2-ounce balls and place on a parchment paper-lined baking sheet. Carefully insert a lollipop stick into each cheesecake ball. Freeze the cheesecake pops, uncovered, until very hard, at least 1 – 2 hours.

When the cheesecake pops are frozen and ready for dipping, prepare the chocolate. In the top of a double boiler, set over simmering water, or in a heatproof bowl set over a pot of simmering water, heat half the chocolate and half the shortening, stirring often, until chocolate is melted and chocolate and shortening are combined. Stir until completely smooth. Do not heat the chocolate too much or your chocolate will lose it’s shine after it has dried. Save the rest of the chocolate and shortening for later dipping, or use another type of chocolate for variety.

Quickly dip a frozen cheesecake pop in the melted chocolate, swirling quickly to coat it completely. Shake off any excess into the melted chocolate. If you like, you can now roll the pops quickly in optional decorations. You can also drizzle them with a contrasting color of melted chocolate (dark chocolate drizzled over milk chocolate or white chocolate over dark chocolate, etc.) Place the pop on a clean parchment paper-lined baking sheet to set. Repeat with remaining pops, melting more chocolate and shortening (or confectionary chocolate pieces) as needed.

Refrigerate the pops for up to 24 hours, until ready to serve.
They aren't all that pretty. I didn't really get the chance to decorate these. They were too delicious and didn't last long at all. The recipe could use a little tweaking. I may revisit this again to perfect it as they would be a great treat to share. Mega yum!

Tuesday, April 15, 2008

Rose Parade

As a member of the Post Punk Kitchen forums, I hear about all the great new vegan cookbooks as they come out. Someone is always rushing out to pick up a copy and make something from it. Many members are cookbook and cookzine authors themselves which gives you an even greater resource as you can ask the author your questions or comment directly. The book of my obsession over the last week is one of those very books.

Yellow Rose Recipes by Joanna Vaught is a great book for people who love good food and don't want to take all day making it. This book came about through her blog of the same name, definitely check it out for updates on her next delicious cookbook and additional recipes. I have not made all the recipes, yet. Have a look at some of the tasties I have made.

Chana Masala with Lemon Rice. I added spinach to this because I felt in need of some green. It was far too delicious (even though I shook my hand a little too hard when I was adding the spice and dumped a bit too much in). Chickpeas are good for everything, they just are. And this rice, what can I say, it was bright with scents and flavors of lemon but also smooth and almost a touch of creaminess to it.
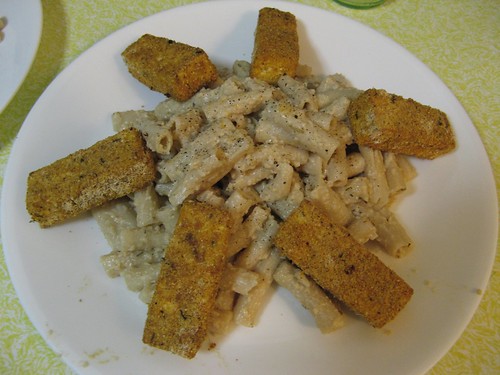
The base of this plate o'deliciousness is Penne Alfredo. Encircling are Cajun Spiced Tofu fingers. I could have eaten the penne on it's own for a couple meals easily but sometimes the husband needs a bit more. This is where the spiced tofu came in. These two were a match made in heaven and the leftovers were a welcome lunch treat the next day.

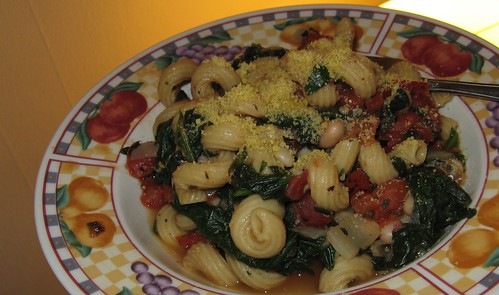
Most days I am getting home from work at the time I'd like to be eating dinner. Although living out of a crockpot is a possibility I am not talented enough with it to keep it interesting at the moment. This pot of Pasta E Fagioli was just the ticket. It came together quite quickly and didn't take every last bit of my waning energy to prepare. Far from it really. On top you'll notice was looks like a sprinkling of Parmesan cheese. "What the heck?" you say "Isn't she vegan?" Yes, yes I am. That's not parm. Joanna was kind enough to include an excellent recipe for a Vegan Parmesan that is quite enjoyable and really completes this dish.
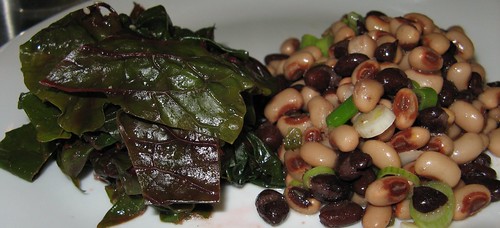
Now I'm new to these crazy southern traditions like "mess o'greens" and "texas caviar" but I'm adventurous enough to give them a whirl. Enter Lemon Pepper Chard and Texas Caviar. I see these as wonderful barbecue accompaniments. They just taste like summer, bright, a bit tart, cool. These will be back when we start firing up the grill in a month or so.
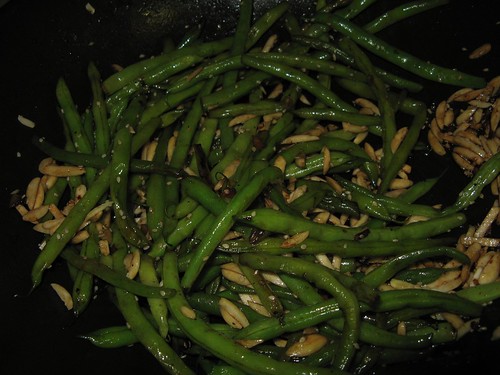
In the book, Joanna mentions making these Sesame Green Beans for her boyfriends family the first time she met them. They loved them and pestered her for the recipe. Often reading accounts like this we super impose our own little, "yeah sure they did" thoughts. I now know I would have been in that badgering group of recipe beggars. These beans drove me to pick up more green bean seeds to grow, I need more beans!
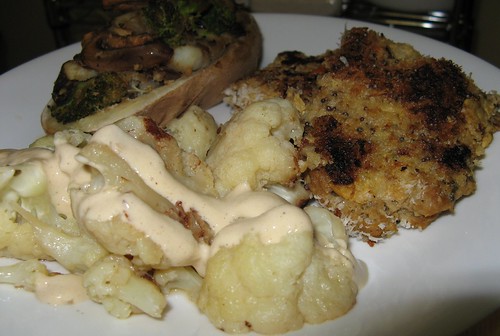
This plate holds five separate recipes which testifies to the modularity of these dishes. In the foreground you see Braised Cauliflower. I know there are a lot of haters out there but I beg of you to give it just one more try. This cauliflower came out great on it's own but I took the suggestion in the book notes to try it with Lemon Tahini Dressing. The dressing is great, I've been pouring it here and there on food ever since. Next to that is a Mustard Crusted Seitan cutlet, I used Joanna's Simple Chicken Style Seitan to make the cutlets but you could buy some seitan if you'd rather not make it yourself. This is the second time I've made this seitan. It will not be the last. Finally in the background you can barely see the Stuffed Twice Baked Potato. This can be a meal in itself but true to my style I like to make a lot of food when I can (it keeps the frige full of leftovers and the hubby happy).

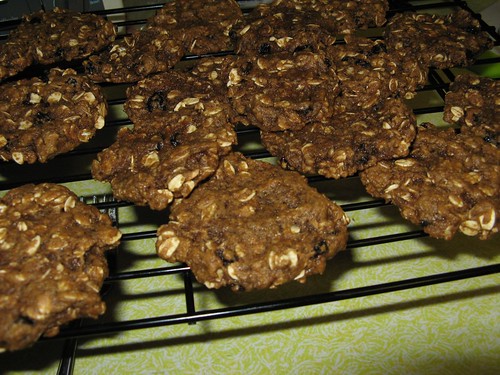
Now onto sweet things. First make Oatmeal Cookies, toss in some raisins or chocolate chips if you like but they are by no means necessary.
Then continue on with the recipe making the cream filling for Oatmeal Cream Pies. Now I am a devout chocolate lover but these cookies, pies, sammies, whatever they are, are amazing little cakes of joy.
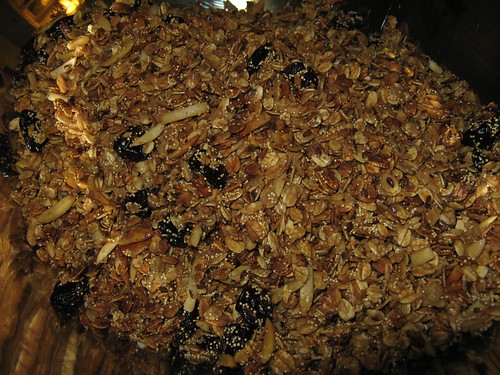
Oh and if you want to continue your Yellow Rose Recipes fun into the morning hours there recipes for that too. Here I made the Cherry Almond Granola. I have never made granola before but I surely will make it much more often now.
That's enough Yellow Rose fun for now. I'll be making more, you can be sure of that.

Wednesday, April 9, 2008

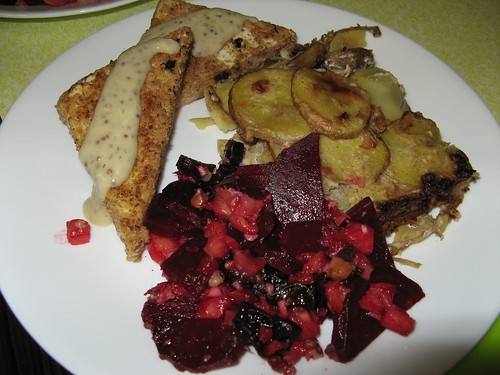
Tonight's dinner was crazy good, dispite it's weirdness in places. Scalloped potatoes, beet salad which will hence forth be called weird beets, and crusted tofu with horseradish mustard sauce. The scalloped potatoes relied on tahini for it's creaminess, yummy taters. The beets, are they vegetables or fruit? You really wonder after eating these. The combination of beets, pineapple, walnuts and a little garlic for fun is actually really tasty. Now the tofu, crazy good.
Herb Crusted Tofu with Horseradish Mustard Sauce

16oz extra firm tofu, pressed and cut into 4 1/2" "steaks"
2 Tb corn starch & 4 Tb water
1-2 Tb vegetable oil, for frying
Sauce
1 8oz container plain soy yogurt
2 Tb Coarse Ground Mustard
1 tsp agave (or sweetener of your choice)
2 tsp prepared horseradish
1/2 tsp dried dill
Crust Coating
1/3 c matzoh meal (or fine bread crumbs)
1/2 tsp dried dill
1/4 tsp garlic powder
Salt & Pepper, to taste
In a small bowl, whisk together sauce ingredients and set aside. In another small bowl combine crust ingredients. Spread evenly on a plate and set aside. Combine water and cornstarch in wide shallow dish. Set up your dishes next to the stove, cornstarch, crust, pan. Heatoil in a large skillet over medium heat. Coat each slice of tofu with cornstarch mixture, crust coating and place in the skillet. Cook until crispy, about 3-4 minutes, flip to cook other side. Transfer slices to plates and drizzle with sauce. Or just scoop on that sauce, yeah it's that good.

Dinner tonight was brought to you by:
Rabbi's Roots Horseradish
This is the first time I've used this in a recipe other than a bloody mary. It's great stuff. In the recipe the heat of the horseradish blended really well with the rest of the ingredients, not providing too much heat, just that little something.

Friday, April 4, 2008

Burgers & Bundts

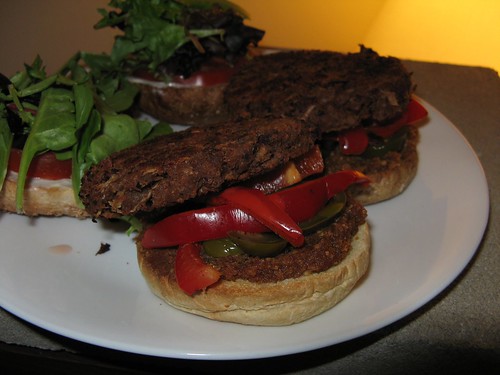
It was a Veganomicon kind of night tonight. I wanted something quick. I used up all my creative and happy energies at work. I needed simple and tasty. I settled on Vcon's Black Bean Burgers with lettuce, tomato, red pepper, and peanut sauce.
As we can see, Lex needed two.
These were great. As anyone who has made a veggie burger from scratch knows getting them to hold together is the biggest challenge. These are the most stable burgers I have ever made and so easy! They are the perfect basic burger as they are, able to take on any sauce, any spice. I will indeed be making these again.

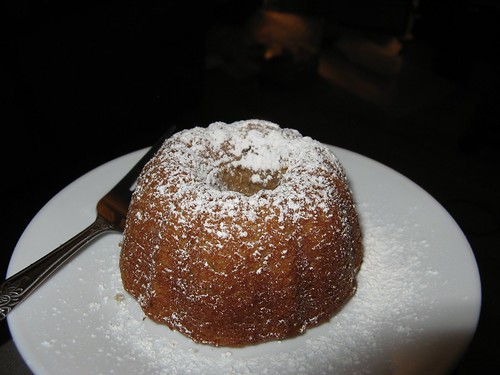
And for dessert. Oh yes dessert. I can't behave for more than a day at a time. Vcon's Coconut Lemon Bundt Cake. I used my mini bundt pan because it is oh so cute and because I don't have a regular sized bundt.
This was delicious! So moist and cakey. I would have been safe from eating this little bute if Lex hadn't received a new bike part to fit on his motorcycle so he was at the shop and I was left to my own devices in the kitchen.

Tuesday, April 1, 2008

Tropical Tempeh

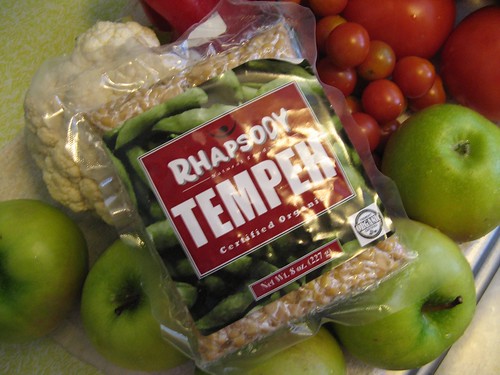
Tempeh is a delicious thing, even more so when you can buy local. Exhibit A:
Rhapsody Tempeh is from Montpelier, VT and is available in 8oz and 3lb packages. The best thing about this delicious package is, not only are you buying a local organic product but it costs exactly the same as the Lightlife tempeh. I have never visited their cafe (in fact I didn't know they had one until I searched for their website) but I will next time we can't think of anything to do on a day off. But really, when you think of Vermont, you don't think tempeh. It's pretty great.

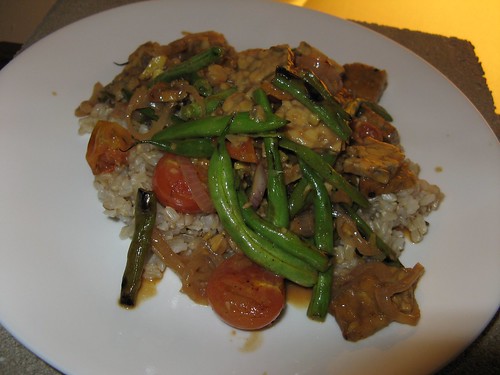
If you're new to tempeh or maybe never had it before this is a good first recipe. The coconut makes it creamy while the lime gives is a bright summery flavor. The sauce for this dish will transport you to a tropical island. Perfect for this time of year when we have had enough of winter but winter isn't ready to release it's grip just yet. Serve this over rice.


Coconut Lime Tempeh with Green Beans & Macadamias
Sauce
1 cup coconut milk
Zest and juice of 2 limes

1 large shallot, thinly sliced
3 Tb brown sugar
1 Tb minced fresh ginger
1/2 tsp salt
1/8 tsp cayenne

The rest
8oz tempeh, cut into 1/4" slices then 3/4" pieces
8oz green beans, ends trimmed then cut in half
1 tsp olive oil
1 cup cherry tomatoes, halved
2 cloves garlic, finely chopped
2 Tb soy sauce
2 Tb chopped macadamia nuts

1. Preheat oven to 375 F. Stir together sauce ingredients in a large bowl. Place tempeh in bowl and gently stir to cover all pieces. Use a 9x13" pan (glass recommended) to spread out tempeh and shallot pieces. Reserve leftover sauce, set aside. Bake tempeh 20 minutes, until tempeh starts to brown and sauce in the pan is bubbling. Remove from oven and keep warm until needed.
2. In a large skillet over medium heat, heat oil and saute beans about 7 minutes. Add tomatoes and cook 3 more minutes. Stir in garlic and heat for another 1 minute. Stir soy sauce into reserved sauce mixture and add to pan, heat through. Add in baked tempeh and gently toss to mix and heat through. Serve over rice.